NetApp Configuring the SP

A Service Processor (SP) provides remote management capabilities, including console redirection, logging and power control for NetApp systems.

It also extends AutoSupport by sending additional system event alerts. The AutoSupport settings are used for sending these alerts through e-mails over the SP LAN interface.

All FAS22x0, FAS32x0 and FAS62x0 series storage systems have Service Processors.

Steps For Configuring the SP

  1. At the storage system prompt, enter one of the following commands:
    • setup If you want to change both system setup and SP configuration, you use the setup command. When the storage system setup process is complete, the sp setup command runs automatically and prompts you for SP configuration information.
    • sp setup If the storage system has been set up and you want to configure only the SP, you use the sp setup command, which omits system setup and prompts you directly for SP configuration information.
  2. When the SP setup asks you whether to configure the SP, enter y.
  3. Enter one of the following when the SP setup asks you whether to enable DHCP on the SP:
    • To use DHCP addressing, enter y.
    • To use static addressing, enter n.
  4. If you do not enable DHCP for the SP, provide the following static IP information when the SP setup prompts you to:
    • The IP address for the SP
    • The netmask for the SP
    • The IP address for the SP gateway
    • The name or IP address of the mail host to use for AutoSupport (if you use the setup command.)
  5. At the storage system prompt, enter the following command to verify that the SP network configuration is correct: sp status
  6. At the storage system prompt, enter the following command to verify that the SP AutoSupport function is working properly: sp test autosupport
Configuring the SP.

What is service processor and how to use it?

Microsoft PowerShell with F5

Microsoft Windows PowerShell command line shell and scripting language helps IT professionals achieve greater control and productivity.

Windows PowerShell allows IT professionals to more easily control system administration and accelerate automation.

The iControl PowerShell Snapin is a set of Cmdlets for Windows PowerShell that give you the full power of the iControl API.

To use the iControl PowerShell Snapin download and install it on your PowerShell working Station.

  1. Download iControlSnapInSetup.msi installer.
  2. Run the iControlSnapInSetup.msi installer.  This will install the SnapIn into the c:\program files\F5 Networks\iControlSnapIn directory.
  3. Start PowerShell.
  4. Cd to ‘C:\Program Files (x86)\F5 Networks\iControlSnapIn’ directory.
  5. Dot Source the setup script only once after the install   ./setupSnapIn.ps1
  6. Load the SnapIn into the Runtime – Add-PSSnapIn iControlSnapIn
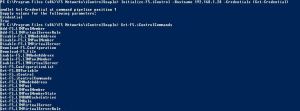
  7. Initialize the iControl connection with the Initialize-F5.iControl CmdLet

Initialize-F5.iControl -Hostname bigip_address -Credentials (Get-Credential)

8. Run the Get-F5.iControlCommands CmdLet to list out all the available Cmdlets

Get-F5.iControlCommands

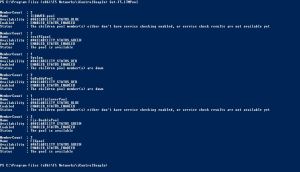
9.       Try out some of the CmdLets like Get-F5.LTMPool

MICROSOFT POWERSHELL WITH F5 pic 1

MICROSOFT POWERSHELL WITH F5 pic 2

MICROSOFT POWERSHELL WITH F5 pic 3

  • If you get error like this when trying to load the snap-in with Add-PSSnapIn iControlSnapIn than run these command lines:
  • c:\windows\Microsoft.Net\Framework64\v2.0.50727\installutil.exe iControlSnapin.dll /LogFile=
  • Add-PSSnapIn iControlSnapIn.
  • Initialize-F5.iControl -Hostname BIG-IP Address -Credentials (Get-Credential)

Source: Microsoft PowerShell with iControl

Run PowerShell Script As Scheduled Task

Run PowerShell Script as a Scheduled Task

  1. On the system that the task will be run from, open the Windows Task Scheduler. This can be found in the Start menu, under Start > Administrative Tools.
  1. In the Task Scheduler, select the Create Task option under the Actions heading on the right-hand side.
  2. Enter a name for the task, and give it a description (the description is optional and not required).
  3. In the General tab, go to the Security options heading and specify the user account that the task should be run under. Change the settings so the task will run if the user is logged in or not.
  4. Next, select the Triggers tab, and click New to add a new trigger for the scheduled task. Click OK when your desired settings are entered.
  5. Next, go to the Actions tab and click New to set the action for this task to run. Set the Action to “Start a program”.
  6. In the Program/script box enter “PowerShell.”

In the Add arguments (optional) box enter the value “.\[Your PowerShell Script Name].” For example, if your PowerShell Script is named “Migration1.ps1” then you would enter “.\Migration1.ps1” as the value.

Then, in the Start in (optional) box, add the location of the folder that contains your PowerShell script. In this example, the script is in a folder called “Script” that is off the root C: drive.

Note: The location used in the Start in box will also be used for storing the scheduled task run times, the job history for the copies, and any additional logging that may occur.

Click OK when all the desired settings are made.

  1. Next, set any other desired settings in the Conditions and Settings tabs. You can also set up additional actions, such as emailing an Administrator each time the script is run.
  2. Once all the desired actions have been made (or added), click OK. The task will be immediately set, and is ready to run.

The scheduling of this task is complete, and is now ready to run based on the entered settings.

Source: Configuring a PowerShell Script to Run as a Scheduled Task

GPT

GPT is Short for GUID Partition Table it defines the layout of the partition table on a hard drive. GPT is meant as a replacement to hard drives using a MBR partition table, which have a 2.20TB size limitation and extends upon UEFI. Using GPT a drive could support between 8 and 9.4 ZB depending on the sector size.

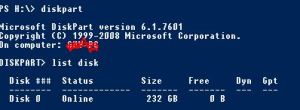
To verify that your disks are formatted as GPT
1. Open CMD
2. Run diskpart
3. Type list disk

GPT

WinSXS Folder

The WinSXS folder contains all Windows system components. When Windows installs updates, it drops the new Windows component in the WinSXS folder and keeps the old component in the WinSXS folder. This means that every Windows Update you install increases the size of your WinSXS folder. This allows you to uninstall operating system updates when necessary.
The WinSXS folder at C:\Windows\WinSXS is massive and continues to grow the longer you have Windows installed. This folder builds up unnecessary files over time, such as old versions of system components.
To Reduce the Size of the WinSXS Folder You may refer to the following steps to remove the file under the %windir%\winsxs\ManifestCache\ to release some disk space that the WinSXS folder takes.

1. Run the following commands from an elevated command prompt (Run cmd as admin):
2. Run “Compcln.exe”
3. Net stop trustedinstaller
4. Wait for it to stop and ensure it stops successfully. If you are unable to stop the service, you may need to
restart your machine.
5. Takeown /f %windir%\winsxs\ManifestCache\*
6. Icacls %windir%\winsxs\ManifestCache\* /GRANT administrators:F
7. Del /q %windir%\winsxs\ManifestCache\*
• There are different tools to do this for different Operating systems
• Windows Vista or Windows Server 2008 Service Pack 1: VSP1CLN.EXE
• Windows Vista or Windows Server 2008 Service Pack 2: Compcln.exe
• Windows 7 or Windows Server 2008 R2 Service Pack 1: DISM /online /Cleanup-Image /SpSuperseded or Disk
Cleanup Wizard (cleanmgr.exe)

Please see the folowing PowerShell script that perform these tasks and reduce the WinSXS folder size. The script has been tested on windows2008 servers.


###########################################################################
#
# AUTHOR: Guy Naftaly
#
# NAME: reduce-winsxs
#
# COMMENT: the script delete WinSXS ManifestCache Folder
#
# VERSION HISTORY: 1.0 23/01/2014 - Initial release
#
###########################################################################

$server = ‘server_name’

#Run “Compcln.exe”#

COMPCLN.EXE /quiet

#stop trustedinstaller service on $server#

Get-Service -Name trustedinstaller -ComputerName $server | Stop-Service -Verbose
Get-Service -Name trustedinstaller -ComputerName $server -Verbose

#Delete WinSXS ManifestCache Folder#

Takeown /f C:\Windows\winsxs\ManifestCache\*
Icacls %windir%\winsxs\ManifestCache\* /GRANT administrators:F
Remove-Item C:\Windows\winsxs\ManifestCache\*

#End#